ListView(AndroidだとRecyclerView)に状態を持ったレイアウトを作ったことがあるとわかるかもしれませんが、
基本的に繰り返しパターンを持ったUIはどのフレームワークでもレンダリングの負荷を下げるためリストのアイテムを再利用して描画します。
Flutterでも同様にListViewではアイテムが再利用されます。
Expandableなアイテム(状態)を持ったListViewではこれが大きな問題になります。
スクロールによって各カラムのインスタンスは破棄されてしまうためListの各カラムに状態を持つことができません。
そのため、基本的にはListView以外のなにかでカラムの開閉状態を管理しなければなりません。
Androidでも同様で、RecyclerViewのViewHolderで状態を管理してしまうとスクロールして画面外に行った後、元の位置に戻ると状態がリセットされてしまいます。
(上記の問題がありView側だけではうまく解決できずに今はメンテをしていないのですが…)AndroidでExpandableLayout
というそれなりに使われたライブラリを出していて、RecyclerView対応は苦労しました。
この記事では、FlutterでExpandableなアイテム(状態)を持ったListViewの管理方法を紹介します。
データ準備
この記事ではこのような構造体を用意してリストで表示します。
import 'package:flutter/material.dart';

class Item {
  Item(this.title, this.color);

  final String title;
  final Color color;
}

final List<Item> data = <Item>[
  Item('A', Colors.pinkAccent),
  Item('B', Colors.pink),
  Item('C', Colors.redAccent),
  Item('D', Colors.red),
  Item('E', Colors.deepOrangeAccent),
  Item('F', Colors.deepOrange),
  Item('G', Colors.orangeAccent),
  Item('H', Colors.orange),
  Item('I', Colors.amber),
  Item('J', Colors.lime),
  Item('K', Colors.lightGreenAccent),
  Item('L', Colors.lightGreen),
  Item('M', Colors.greenAccent),
  Item('N', Colors.green),
  Item('O', Colors.tealAccent),
  Item('P', Colors.teal),
  Item('Q', Colors.cyanAccent),
  Item('R', Colors.cyan),
  Item('S', Colors.lightBlue),
  Item('T', Colors.blue),
  Item('U', Colors.indigoAccent),
  Item('V', Colors.indigo),
  Item('W', Colors.purpleAccent),
  Item('X', Colors.purple),
  Item('Y', Colors.deepPurple),
  Item('Z', Colors.blueGrey),
];
通常のListView
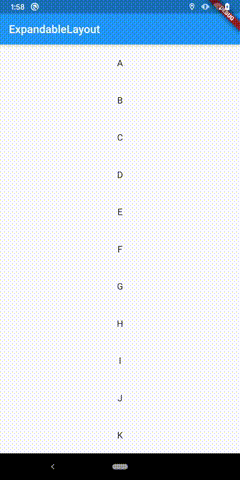
まずは通常のListViewを表示します。
class ExpandableItemExample extends StatelessWidget {
  @override
  Widget build(BuildContext context) {
    return MaterialApp(
      home: Scaffold(
        appBar: AppBar(
          title: const Text('ExpandableLayout'),
        ),
        body: ListView.builder(
          itemBuilder: (BuildContext context, int index) =>
              ExpandableView(item: data[index]),
          itemCount: data.length,
        ),
      ),
    );
  }
}
こちらが各カラムに表示する開閉するWidgetです。
class ExpandableView extends StatefulWidget {
  const ExpandableView({
    Key key,
    this.item,
  }) : super(key: key);

  final Item item;

  @override
  _ExpandableViewState createState() => _ExpandableViewState();
}

class _ExpandableViewState extends State<ExpandableView>
    with TickerProviderStateMixin {
  AnimationController expandController;
  Animation<double> expandAnimation;

  @override
  void initState() {
    super.initState();

    expandController = AnimationController(
      vsync: this,
      duration: const Duration(milliseconds: 500),
    );
    expandAnimation = CurvedAnimation(
      parent: expandController,
      curve: Curves.fastOutSlowIn,
    );
  }

  @override
  void dispose() {
    expandController.dispose();
    super.dispose();
  }

  @override
  Widget build(BuildContext context) {
    return Column(
      crossAxisAlignment: CrossAxisAlignment.stretch,
      children: <Widget>[
        InkWell(
          onTap: () {
            expandController.forward();
          },
          child: Container(
            padding: const EdgeInsets.symmetric(vertical: 24),
            child: Text(
              widget.item.title,
              textAlign: TextAlign.center,
              style: TextStyle(fontSize: 16),
            ),
          ),
        ),
        SizeTransition(
          axisAlignment: 1.0,
          sizeFactor: expandAnimation,
          child: Container(
            color: widget.item.color,
            height: 100,
          ),
        ),
      ],
    );
  }
}
ExpandableViewは明示的に状態管理を行っていません。ただのScrollViewでの表示は問題ありませんが、ListViewのようなアイテムが再生成されるWidgetで表示すると、
一度開いてもアイテムをスクロールして戻ると閉じて表示されてしまいます。
これは前述の通りアイテムがリサイクルされて状態が破棄されてしまうためです。
つまり、Viewの表示が切り替わるアイテムをListViewで表示したい場合は各アイテムの状態管理をしなければなりません。
Androidではこれを自分で行う必要がありますが、Flutterには面倒な状態管理を簡単にできるPageStorage
というクラスがすでに用意されています。
PageStorageKey
これを使って状態管理をします。
PageStorageKey<T>()でItemのKeyを作成して、そのKeyをWidgetに渡します。
そのKeyをコンストラクタでsuperに渡してあげれば、
PageStorage.of(context)?.readState(context) で値を読み込むことができます。
今回書き込みはAnimationController#StatusListenerのコールバックを使って writeState で書き込みます。
expandAnimation.addStatusListener((AnimationStatus status) {
  if (status == AnimationStatus.forward) {
    PageStorage.of(context)?.writeState(context, _isExpanded);
  }
});
他には開閉状態の初期値を外から与えられるようにも変更しています。
先程のコードを書き換えるとこのようになります。
class ExpandableItemExample extends StatelessWidget {
  @override
  Widget build(BuildContext context) {
    return MaterialApp(
      home: Scaffold(
        appBar: AppBar(
          title: const Text('ExpandableLayout'),
        ),
        body: ListView.builder(
          itemBuilder: (BuildContext context, int index) => ExpandableView(
            key: PageStorageKey<Item>(data[index]),  // Keyを追加
            item: data[index],
          ),
          itemCount: data.length,
        ),
      ),
    );
  }
}
class ExpandableView extends StatefulWidget {
  const ExpandableView({
    Key key,
    this.item,
    this.initialExpand = false, // 開閉状態の初期値
  }) : super(key: key);

  final Item item;
  final bool initialExpand;

  @override
  _ExpandableViewState createState() => _ExpandableViewState();
}

class _ExpandableViewState extends State<ExpandableView>
    with TickerProviderStateMixin {
  AnimationController expandController;
  Animation<double> expandAnimation;

  bool _isExpanded = false;

  @override
  void initState() {
    super.initState();

    expandController = AnimationController(
      vsync: this,
      duration: const Duration(milliseconds: 500),
    );
    expandAnimation = CurvedAnimation(
      parent: expandController,
      curve: Curves.fastOutSlowIn,
    );
    expandAnimation.addStatusListener((AnimationStatus status) {
      if (status == AnimationStatus.forward) {
        _isExpanded = true;
        // 状態を保存
        PageStorage.of(context)?.writeState(context, _isExpanded);
      }
    });

    // 前回の状態が保存されていなければ初期値を使う
    _isExpanded = PageStorage.of(context)?.readState(context) as bool ??
        widget.initialExpand;
    if (_isExpanded) {
      expandController.value = 1.0;
    } else {
      expandController.value = 0.0;
    }
  }

  @override
  void dispose() {
    expandController.dispose();
    super.dispose();
  }

  @override
  Widget build(BuildContext context) {
    return Column(
      crossAxisAlignment: CrossAxisAlignment.stretch,
      children: <Widget>[
        InkWell(
          onTap: () {
            expandController.forward();
          },
          child: Container(
            padding: const EdgeInsets.symmetric(vertical: 24),
            child: Text(
              widget.item.title,
              textAlign: TextAlign.center,
              style: TextStyle(fontSize: 16),
            ),
          ),
        ),
        SizeTransition(
          axisAlignment: 1.0,
          sizeFactor: expandAnimation,
          child: Container(
            color: widget.item.color,
            height: 100,
          ),
        ),
      ],
    );
  }
}

状態が保存されたので、スクロールして戻ってきても前回の開閉状態が復元されています。👏
状態の管理を内部のWidgetに閉じることができるので、直感的に書けて便利ですね。
ExpansionTile
今回は自分でExpandableViewというWidgetを作成しましたが、
実はFlutterには簡単な開閉可能なリストのアイテムが用意されています。
もちろん状態管理を内部で行っているので、ListViewでスクロールをしても開閉状態が保たれています。
class ExpandableItemExample extends StatelessWidget {
  @override
  Widget build(BuildContext context) {
    return MaterialApp(
      home: Scaffold(
        appBar: AppBar(
          title: const Text('ExpandableLayout'),
        ),
        body: ListView.builder(
          itemBuilder: (BuildContext context, int index) => ExpansionTile(
            title: Text(data[index].title),
            children: <Widget>[
              Container(
                height: 100,
                color: data[index].color,
              ),
            ],
          ),
          itemCount: data.length,
        ),
      ),
    );
  }
}
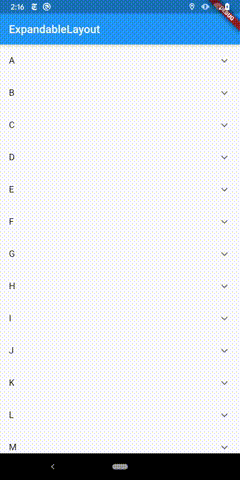
デフォルトのUIで良ければ簡単にExpandableなLayoutが作れます。
まとめ
Viewの状態を管理するための方法を紹介しました。
今回みたいなExpandableなView以外でも状態を持ったViewに対して有効な管理手段の1つだと思います。
ただ、あまりView側で状態管理するのは好ましくないので、基本はStatelessWidgetを使い、今回のようなListView内のアイテムの状態管理みたいな使い方に留めたほうが良いと思います。
Androidで作ろうとすると簡単そうに見えて意外と面倒だったView周りの処理がFlutterではかなり改善されている印象を受けます。AndroidやiPhoneが出て10年近く経ちスマートフォン用のアプリの定石もできてきて、GoogleがAndroidの反省を生かして考えて作っている感じがします。