今回は、こんな感じでクレジットカードの登録画面等でよく見るカメラプレビュー画面にカードの枠をOverlayする画面をFlutterで実装します。

これを実装するためには
- カメラのプレビューを正方形にする
- 長方形の切り抜きShapeをOverlayする
の2つの実装が必要になります。
カメラに関してはFlutter標準のCamera Plugin を使用します。
カメラの準備
Camera Pluginをpubspec.ymlに追加します。
現時点の最新0.7.0+2を使用します。
dependencies:
 camera: ^0.7.0+2
Future<void> main() async {
  runApp(
    MaterialApp(
      title: 'Camera Example',
      theme: ThemeData(
        primarySwatch: Colors.blue,
      ),
      home: ExamplePage(),
    ),
  );
}

class ExamplePage extends StatefulWidget {
  @override
  State<StatefulWidget> createState() => ExamplePageState();
}

class ExamplePageState extends State<ExamplePage> {
  CameraController cameraController;
  bool initialized = false;

  @override
  void initState() {
    super.initState();

    _initCamera();
  }

  @override
  Widget build(BuildContext context) {
    return Scaffold(
      appBar: AppBar(
        title: Text('Camera example'),
      ),
      body: Stack(
        children: [
          _cameraPreview(),
          Align(alignment: Alignment.bottomCenter, child: _button()),
        ],
      ),
    );
  }

  Future<void> _initCamera() async {
    final cameras = await availableCameras();

    if (cameras.length >= 0) {
      cameraController = CameraController(cameras.first, ResolutionPreset.max);
      cameraController.initialize().then((_) {
        if (!mounted) {
          return;
        }
        setState(() {
          initialized = true;
        });
      });
    }
  }

  Widget _button() {
    return Ink(
      decoration: const ShapeDecoration(
        color: Colors.lightBlue,
        shape: CircleBorder(),
      ),
      child: IconButton(
        icon: Icon(Icons.camera_alt),
        color: Colors.white,
        onPressed: () {
          cameraController.takePicture();
        },
      ),
    );
  }

  Widget _cameraPreview() {
    if (initialized) {
      return CameraPreview(cameraController);
    } else {
      return const Center(child: CircularProgressIndicator());
    }
  }
}
Camera Pluginでカメラを表示するには CameraController にカメラを読み込ませる必要があります。
最近の端末はカメラが複数あるのですがメインのカメラはcamerasListの0番目になっていることが多いです。
final cameras = await availableCameras();
cameraController = CameraController(cameras.first, ResolutionPreset.max);
CameraController の初期化が終わったら CameraPreviewにコントローラーを渡してPreviewを表示できます。
CameraPreview(cameraController)
カメラプレビューを正方形にする
class ExamplePageState extends State<ExamplePage> {

  // ~~~

  @override
  Widget build(BuildContext context) {
    return Scaffold(
      appBar: AppBar(
        title: Text('Camera example'),
      ),
      body: Column(
        mainAxisAlignment: MainAxisAlignment.center,
        children: [
          _cameraPreview(),
          const SizedBox(height: 48),
          _button(),
        ],
      ),
    );
  }

  // ~~~

  Widget _cameraPreview() {
    if (initialized) {
      return AspectRatio(
        aspectRatio: 1,
        child: ClipRect(
          child: Transform.scale(
            scale: cameraController.value.aspectRatio,
            child: Center(
              child: AspectRatio(
                aspectRatio: 1 / cameraController.value.aspectRatio,
                child: CameraPreview(cameraController),
              ),
            ),
          ),
        ),
      );
    } else {
      return const Center(child: CircularProgressIndicator());
    }
  }
}
先程のコードを一部変更しています。
CameraPreviewを正方形にするやり方は複数あるのですが、今回はAspectRatioを使います。
コントローラー経由でcameraController.value.aspectRatioでアスペクト比を取得できるので、これを使ってCameraPreviewの比を変えています。
1点注意が必要で、バージョン0.7.0からアスペクト比の定義が逆になったため、以前のバージョンではアスペクト比の計算が逆になります。
そのため、古いバージョンの場合は上記のコードの逆数を指定しましょう。
https://pub.dev/packages/camera/changelog#070
長方形の切り抜きShapeをOverlayする
カメラのプレビューを正方形にできたので次に枠線を描画します。
これも色々やり方があると思いますが、今回はShapeBorderを使って描画しました。
ShapeBorderはPaintをつかってCanvasに任意の形を描画できます。
コードはこのようになっています。
class ExamplePageState extends State<ExamplePage> {
  // ~~~
  Widget _cameraPreview() {
    if (initialized) {
      return Padding(
        padding: const EdgeInsets.symmetric(horizontal: 32),
        child: _CroppedCameraPreview(
          cameraController: cameraController,
        ),
      );
    } else {
      return const Center(child: CircularProgressIndicator());
    }
  }
}

class _CroppedCameraPreview extends StatelessWidget {
  const _CroppedCameraPreview({
    this.cameraController,
  });

  final CameraController cameraController;

  @override
  Widget build(BuildContext context) {
    return AspectRatio(
      aspectRatio: 1,
      child: Stack(
        children: [
          ClipRect(
            child: Transform.scale(
              scale: cameraController.value.aspectRatio,
              child: Center(
                child: AspectRatio(
                  aspectRatio: 1 / cameraController.value.aspectRatio,
                  child: CameraPreview(cameraController),
                ),
              ),
            ),
          ),
          Container(
            decoration: ShapeDecoration(
              shape: CardScannerOverlayShape(
                borderColor: Colors.white,
                borderRadius: 12,
                borderLength: 32,
                borderWidth: 8,
              ),
            ),
          ),
        ],
      ),
    );
  }
}
// クレカ標準の比
const _CARD_ASPECT_RATIO = 1 / 1.618;
// 横の枠線marginを決める時用のfactor
// 横幅の5%のサイズのmarginをとる
const _OFFSET_X_FACTOR = 0.05;

class CardScannerOverlayShape extends ShapeBorder {
  const CardScannerOverlayShape({
    this.borderColor = Colors.white,
    this.borderWidth = 8.0,
    this.overlayColor = const Color.fromRGBO(0, 0, 0, 80),
    this.borderRadius = 12,
    this.borderLength = 32,
    this.cutOutBottomOffset = 0,
  });

  final Color borderColor;
  final double borderWidth;
  final Color overlayColor;
  final double borderRadius;
  final double borderLength;
  final double cutOutBottomOffset;

  @override
  EdgeInsetsGeometry get dimensions => const EdgeInsets.all(10);

  @override
  Path getInnerPath(Rect rect, {TextDirection textDirection}) {
    return Path()
      ..fillType = PathFillType.evenOdd
      ..addPath(getOuterPath(rect), Offset.zero);
  }

  @override
  Path getOuterPath(Rect rect, {TextDirection textDirection}) {
    Path _getLeftTopPath(Rect rect) {
      return Path()
        ..moveTo(rect.left, rect.bottom)
        ..lineTo(rect.left, rect.top)
        ..lineTo(rect.right, rect.top);
    }

    return _getLeftTopPath(rect)
      ..lineTo(
        rect.right,
        rect.bottom,
      )
      ..lineTo(
        rect.left,
        rect.bottom,
      )
      ..lineTo(
        rect.left,
        rect.top,
      );
  }

  @override
  void paint(Canvas canvas, Rect rect, {TextDirection textDirection}) {
    final offsetX = rect.width * _OFFSET_X_FACTOR;
    final cardWidth = rect.width - offsetX * 2;
    final cardHeight = cardWidth * _CARD_ASPECT_RATIO;
    final offsetY = (rect.height - cardHeight) / 2;

    final backgroundPaint = Paint()
      ..color = overlayColor
      ..style = PaintingStyle.fill;

    final borderPaint = Paint()
      ..color = borderColor
      ..style = PaintingStyle.stroke
      ..strokeWidth = borderWidth;

    final boxPaint = Paint()
      ..color = borderColor
      ..style = PaintingStyle.fill
      ..blendMode = BlendMode.dstOut;

    final cutOutRect = Rect.fromLTWH(
      rect.left + offsetX,
      rect.top + offsetY,
      cardWidth,
      cardHeight,
    );

    canvas
      ..saveLayer(
        rect,
        backgroundPaint,
      )
      ..drawRect(
        rect,
        backgroundPaint,
      )
      // Draw top right corner
      ..drawRRect(
        RRect.fromLTRBAndCorners(
          cutOutRect.right - borderLength,
          cutOutRect.top,
          cutOutRect.right,
          cutOutRect.top + borderLength,
          topRight: Radius.circular(borderRadius),
        ),
        borderPaint,
      )
      // Draw top left corner
      ..drawRRect(
        RRect.fromLTRBAndCorners(
          cutOutRect.left,
          cutOutRect.top,
          cutOutRect.left + borderLength,
          cutOutRect.top + borderLength,
          topLeft: Radius.circular(borderRadius),
        ),
        borderPaint,
      )
      // Draw bottom right corner
      ..drawRRect(
        RRect.fromLTRBAndCorners(
          cutOutRect.right - borderLength,
          cutOutRect.bottom - borderLength,
          cutOutRect.right,
          cutOutRect.bottom,
          bottomRight: Radius.circular(borderRadius),
        ),
        borderPaint,
      )
      // Draw bottom left corner
      ..drawRRect(
        RRect.fromLTRBAndCorners(
          cutOutRect.left,
          cutOutRect.bottom - borderLength,
          cutOutRect.left + borderLength,
          cutOutRect.bottom,
          bottomLeft: Radius.circular(borderRadius),
        ),
        borderPaint,
      )
      ..drawRRect(
        RRect.fromRectAndRadius(
          cutOutRect,
          Radius.circular(borderRadius),
        ),
        boxPaint,
      )
      ..restore();
  }

  @override
  ShapeBorder scale(double t) {
    return CardScannerOverlayShape(
      borderColor: borderColor,
      borderWidth: borderWidth,
      overlayColor: overlayColor,
    );
  }
}
今回はクレジットカードっぽい形にしたいので枠の比を1:1.618にします。
(余談ですがクレジットカードのサイズは世界共通になっていて、黄金比になっているみたいです。)
考え方としては
正方形の一辺(便宜上横幅)を基準として、左右に5%のmarginをとります
final offsetX = rect.width * _OFFSET_X_FACTOR;横幅からmarginを引いてカードの横幅を決めます
final cardWidth = rect.width - offsetX * 2;カードの横幅が決まるのでアスペクト比から高さを決めます
final cardHeight = cardWidth * _CARD_ASPECT_RATIO;中央寄せするためにカードの縦幅から縦のmarginを計算します
final offsetY = (rect.height - cardHeight) / 2;
これらから座標を求められるので、黒のアルファの背景を指定したのちにdrawRectを使ってCanvasに描画します。
上に重ねるShpaeが作れたらStackWidgetを使って上に重ねるだけです。
まとめ
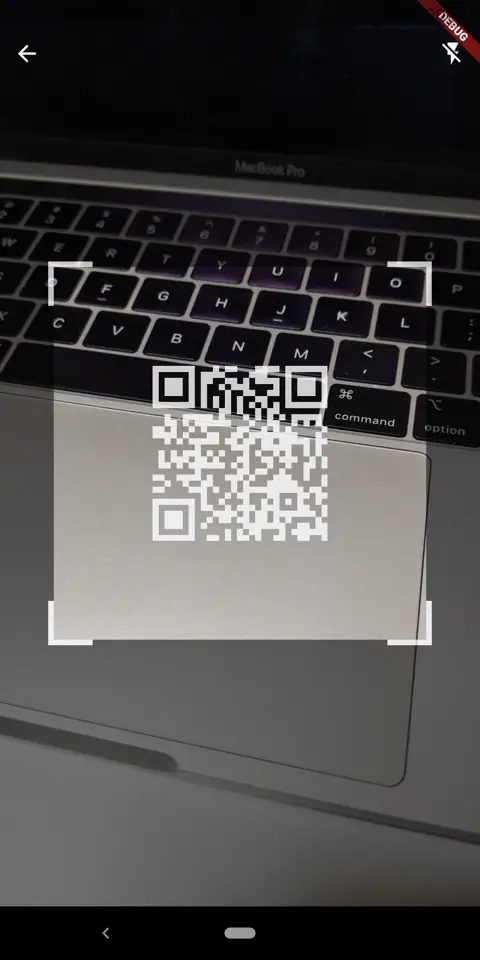
Canvasが操れるようになれば、こんな感じでQR Codeを読み取るUIも自作できるようになるのでいざという時のために慣れておきましょう。